Hanmade in Cornwall

Hanmade in Cornwall

Thursday 29 March 2012

Easter ideas

I have been looking on Pinterest at some Easter ideas. I belive Easter is about Jesus rather than just bunnies, chocolate eggs and chicks. Here are a few ideas to make and do over this time.
What do you think Easter is about?


1 mustardseeds.typepad.com

2 flickr.com

3 twogirlsbeingcrafty.blogspot.com

4scrapbooking.craftgossip.com

5 ellinee.com

6 mathastewart.com

7 iammommy.typepad.com

8 re-nest.com

Thursday 22 March 2012

Hanmade crochet necklace

I haven't done much crocheting, but I spotted some necklaces that I really liked and thought I would give it a go.

3 etsy.com

 These are all really pretty. As I haven't done any crotcheting I needed to start off simple. I did quite alot of research to get me going, trying to find tips and simple ways to start. I noticed that there is a difference in patterns from ones used in America and England. When it said do do one stitch it might mean something different.
So with this in mind I went to my local library and found the book 'Hooked on Crochet' by Candi Jenson. I found it really helpful, particuarly in how to make flowers. So I started making a few flowers and they were turning out ok! I started to try out different stitches and tried different yarns, which affected how the flower came togther.


I then wanted to make a chain (foundation stictch) for my necklace. I had already done this for starting to make my flower, so I had lots of practice. Its really simple. If you need help try this step by step guide. I made two chains for my necklace.
I then added my flower with a button in the centre. And thats it done! Horray!


Thanks for reading!

Wednesday 21 March 2012

Hanmade cute baby card

Is it the season we are in? - There are babies everywhere! One last week and three in the last two days, so thats a reason to make this cute baby card.              
                     
                                 
I love making persoanl cards and of course paper bunting and stitches are always pretty.


I cut hearts out and wrote the letters on. Then sewing over the top to make heart buting.
Very simple and cute.
Give it a try!

Tuesday 20 March 2012

New fabric!

I have some new fabric, yay!

There is some heavier velvet that would be used for furnishings and also some lighter patterned coloured fabric. I am currenly planning on how to use them!


I will let you know what I come up with!

Friday 16 March 2012

Hanmade card and envelope

I have been a busy little bee! I have been making some invites and wanted to make them special so I decided I would make my own envelopes to go with them.
I got the inspiration for the envelopes here of which there are loads of templates and ideas to get you going. You can make your own template or just download one - this is easier as it gets the right corners and creases already.

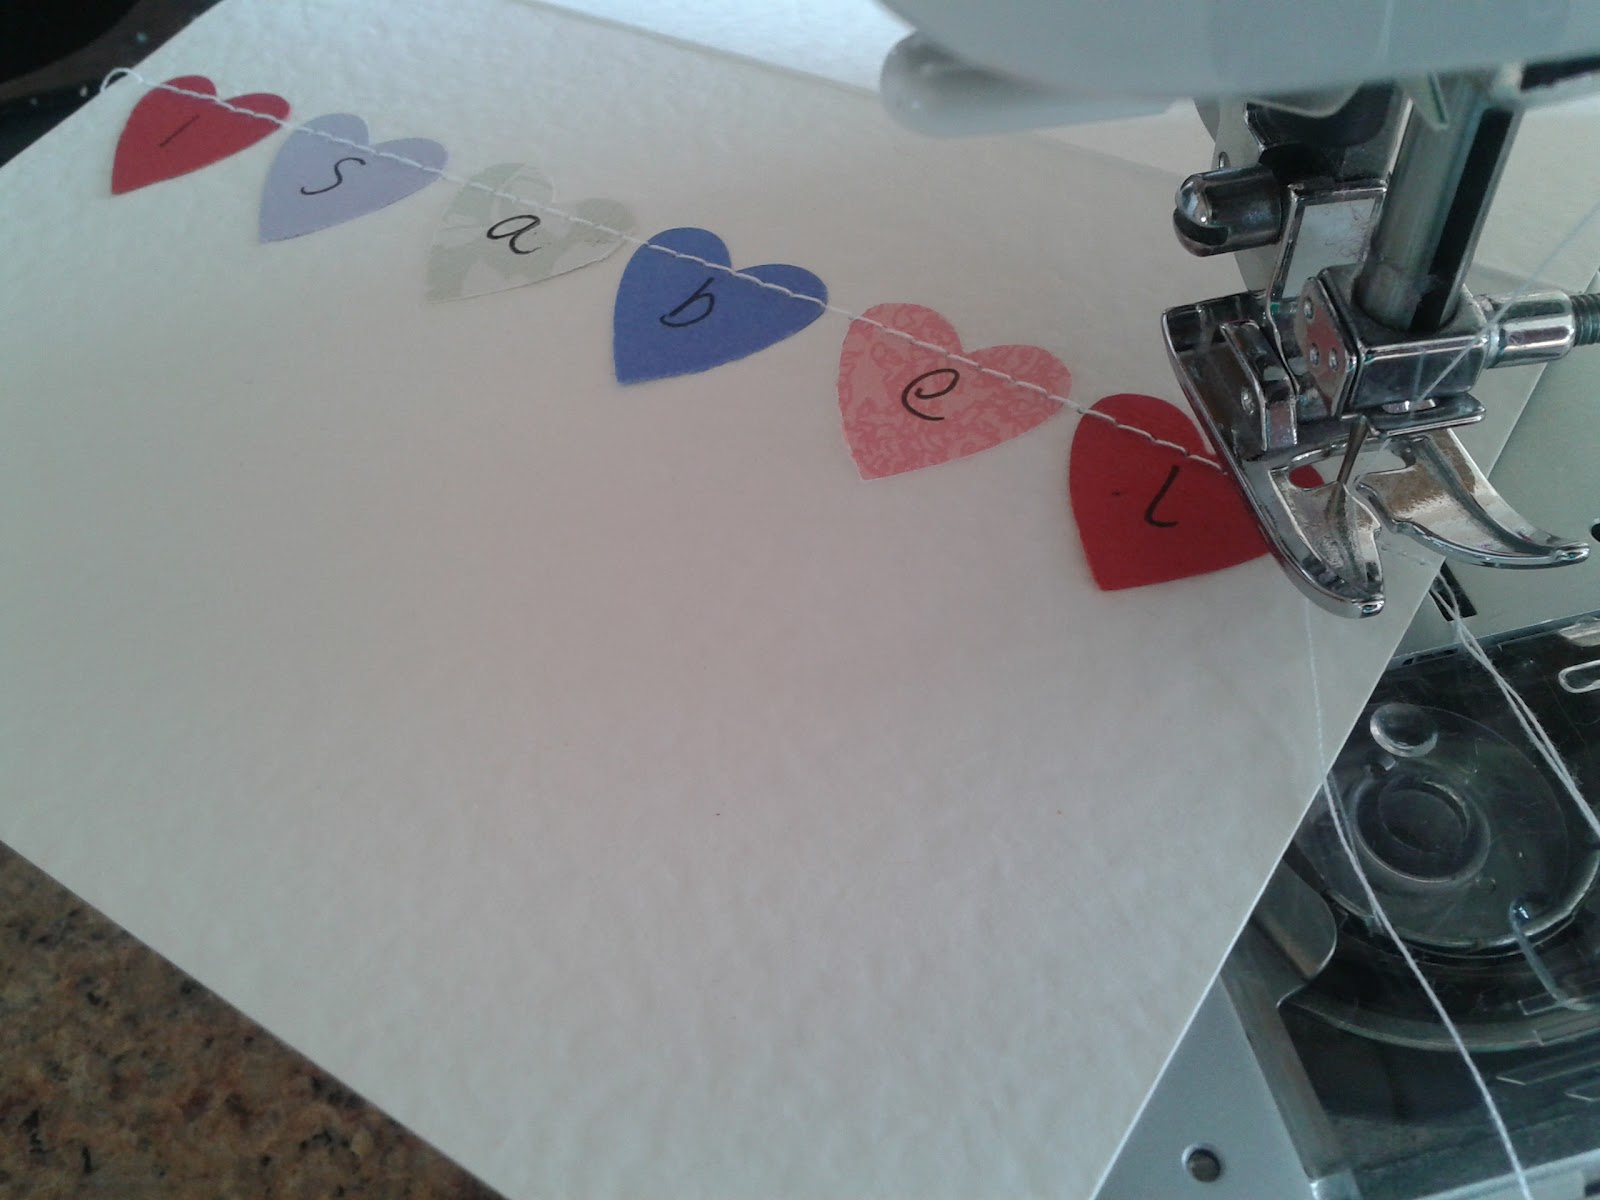
This is the card I made. I love stitches onto paper and card, bunting and I wanted to try out using a doilli, so I combined them altogether to make this invitation.


What do you think?!

Here is how I made the envelopes
I used pretty wallpaper, template printed onto card, ruler, knife and glue
 Cut around the template
 Cut the corners too. Then take the end of the scissors and score where you will fold, this is the doted line on the template.
 I folded the bottom part in first
 The left side
 Then the right
 Glueing as you go along
 the envelope is ready! Easy!
 I made 6 and some in the different kind of paper. My favourite is the middle ones!
 A great project to use up scrap paper.

Monday 12 March 2012

Blue Inspiration

What a lovely day, its like it's spring or something! Here are a few favourite blue things, enjoy!


1 french-knot.tumblr.com
2 french-knot.tumblr.com
3 maryjanesfarm.org
4 littlebirdiesecrets.blogspot.com
5 skcnis.com
6 wipkits.blogspot.com
7 folksy.com
8 flickr.com
9 joannanoelblogcpot.com
10 craftyjemima.blogspot.com


Friday 9 March 2012

Jamie's cheat pizza, umm!

I really like this recipe, its really easy to make and you can use what ever you have in your fridge. I have made it a few times and have got the hang of it so I thought I would share it with you.
Its from Jamie Oliver's book, 30- Minute Meals.


 Jamie's cheat pizza

Ingredients:
1 and half cup/ mug of self raising flour, half a cup/ mug of tepid water, glug of olive oil, pinch of salt
(what ever cup or mug you use make sure you use the same one for the flour and water)
Mix the ingredients together in a food processor.
 Mix until smooth.
 Roll out onto a floured surface, no thicker than a £1 coin. Heat a frying pan.
Turn your grill on.
Add oil to the pan, making it very hot. Then add your dough to the pan. Whilst the pan is still on you add your topping. This is a small pizza for my daughters dinner, so I put tomato sauce, herbs and mozeralla and cheddar cheese. Check how the base of the pizza is doing in the pan, you dont want it to burn, just to cook the base evenly.
Once the base is cooked put the pizza in the pan into a hot gril for 3-5 minutes to cook the top of the pizza.
 And there you go! Easy!

Wednesday 7 March 2012

Local Photography

Here are a few shots on a cold day from a local Abbey.


All these photos have been taken by myself, please do not use, many thanks

Monday 5 March 2012

Molly the Monkey

I am really chuffed with how this turned out. I have never made soft toys before so it was definetly a first. Its quite simple but takes abit of time in places. It can't be rushed but I think it was worth it.
I found a tutorial here so check it out. I made mine abit simpler (without clothes!) for my first try.

 I had a few fabrics I wanted to use. Cut out the template and fabric pieces.
 Sew the face, ears  and eyes onto the head.
 Sew the tail, arms and legs right sides together. then using a safety pin turn them the right way round.
 So far . .. .
 I like the ears!
 Stuff the head with filler.
 I wanted to hand sew a smile on, cute!
 Stuff the legs, arms and tail with filler too.
 Now you have to be clever with this bit, everything needs to go inside the body like a sandwich, pin together.
 Then add more stuffing to the body and sew the back up.
 And its done! Not bad for my first try.