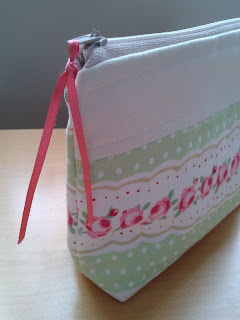
So, here I am (!) and here is this cute pouch bag and its so simple to make.
Below are some steps of how you can make your very own zip bag too!
Collect your bits together, you will need a 8" zip, exterior x2 at 9.5"x 8" tall, lining x2 9.5"x8" tall. I also used a fleece lining, so make this the same size.
Press all the fabric, now you are ready to start.
Put the exterior piece of fabric onto the fleece lining and do some quilting. You can leave this step out if you want.
Put the exterior piece of fabric down, with the zip the wrong way up (apologies at this point at this picture is incorrect, the zip is the wront way round!) Then put the lining on top of the fabric and zip. then with your zip foot, sew along the top edge.
Then push those two pieces of fabric together out of the way, leaving the other side of the zip visible, for the next step.
Now the zip is the other end
(I should also point out at this point that I changed my lining fabric, sorry for any confussion!)
Put the remianing exterior piece of fabric down right side up.
Put the lining onto, so both the lingnings face each other right sides together.
Pin together and sew along the zip edge.
Now lay it out flat and press.
Now sew along the zip on each edge
Now open the fabric out, you want both the lining together and both the exterior pieces of fabric together with the zip open in the middle. Pin around the dges. You are going to sew around the edges of this in a rectangle shape. Start at the bottom of the lining, continue round and then leave a gap of about 4".

Here is my 4" gap.
Push the exterior corners out with your finger.
Measure 1.5" from the top and draw a line across.
Now sew across this line and trim carefully. Repeat on the other corner.
Now turn the bag the right way round. Sew together the 4" gap. See above picture.
Add a small ribbon onto the zip pull and your done!
And then make another!


