Hanmade in Cornwall

Hanmade in Cornwall

Saturday 31 December 2011

Meadowgate

I remember watching Kirstie decorating and doing up her Devon home. She based the series on different rooms in the house, filling them with hand crafted projects, antiques and car boot sale bargains. It was inspiring.

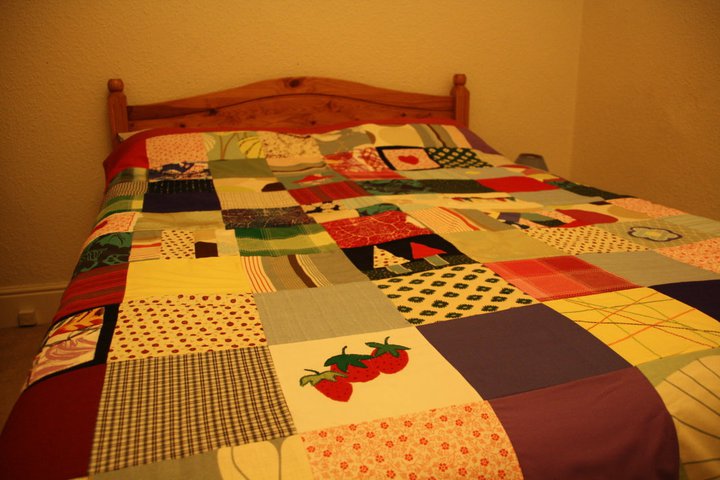
A friend then showed me this, Kirstie has put the house to hire for holidays. It is rather expensive, but great to look at to see what she has done. Check it out.


Click on photos to enlarge.

Murder Mystery

Well Christmas is over and its almost the new year. We are celebrating with friends, although one of us is a murderer! We haven't done a murder mystery before so it shall be fun.

The suspects:
Sigmund Froid - The Cold Austrian Psychoanalyst
With clipped beard, glasses, cigar and smart suit, Sigmund
has a wonderfully calm bedside manner, even if he is
obsessed about your dreams and sex life.

Heidi Evidence - Swiss Bank Clerk
A wonderfully beguiling lady with pigtails, freckles and
innocent expression. She is often seen in either her smart
banking suit, or her Swiss national dress.

Ivan Ego - Russian Inventor
Pessimistic and pragmatic to the last, Ivan is reliable and built
to last, even if he does run on vodka.

Dee Sypher - Code Breaker
Secretive and quiet, Dee is a real cloak and dagger sort of a
girl in dark glasses and trench coat.

Herr Cutt - German Barber
Never without his trusty pair of scissors, Herr Cutt is round
but well turned out with a pencil moustache and slicked hair.

Kiki De’Leggs - French Cancan Dancer
Always dressed to show off her fabulous legs Kiki is always
Ra-Ra-ready for anything.

Saturday 24 December 2011

It's Christmas!


                                                         Christmas Eve breakfast waffle
 Home picked parnsips. Our first time every growing them, not bad! Will enjoy tomorrow.


Can't wait to open these.


Salt dough fun!

I have wanted to do this for a while. So I decided to give it a go.

Ingredients:
2 cups Plain flour
1 cup Salt
1 cup Water

You can use any measuring cup as long as you keep the ratios the same. You can use a mug if you want.
Mix the flour and salt together. Gradually add the water until its a dough. Let the dough stand for 20 minutes.


Roll the dough out on a very floury surface. Use shape cutters to cut shapes.

 Place on greaseproof paper and put in the oven. Put the oven of 60C for 4 hours. I cooked mine for 6 hours. Or you could let them air dry but this would take at least 48 hours. Don't be tempted to turn the over up higher, the start to peel and crack.
 Make them look pretty and add a hole in the top. I used skewers and cocktail sticks. Make sure you make a good size hole for your ribbon. I also used rubber letter stamps to write words onto them.

 When hard, decorate, paint and add ribbons. You can put them on the tree or use them as present tags.
Tada!

Saturday 17 December 2011

Paper Christmas Tree

Easy step by step to make a paper christmas tree, great to decorate your home or dining table. Check out the steps here

Christmas food ideas

I was watching Jamies Chirstmas with bells on and I got inspired to make some different food this Chirstmas time. So I thought I would share some of my favourites. I have already decided we are going to make the waffles for breakfast on Christmas Eve.

Griddle-pan waffles

Jamie: I'm a little bit in love with this. I was experimenting with different types of waffles, trying lots of ways of cooking them and looked at a griddle pan and thought... YES! And you know what, it works like a charm - beautifully golden, crisp waffles every time.
Serves 4 to 6
  • 2 large free-range eggs
  • 300ml semi-skimmed milk
  • ¼ teaspoon salt
  • 225g self-raising flour
  • 2½ level tablespoons baking powder
  • 100g unsalted butter, plus an extra knob
1. Crack the eggs into a bowl and whisk with the milk. Add the salt, sift in the flour and baking powder then whisk together until fully combined. Melt the butter, allow it to cool slightly, then gradually stir it through the mixture. After this point, it's important not to stir the mixture any more and to leave it to rest for at least 30 minutes before cooking.

2. Pop your griddle pan on a high heat so it's screaming hot, add a small knob of butter, jiggle it all around the bars and as soon as it's melted scoop in your batter and spread it around to fill the pan. You can make smaller waffles, if you prefer, by dotting the mixture into the pan.

3. Lower the heat to medium, and cook for 8 to 10 minutes, or until lightly golden on the bottom. Now, this bit's quite tricky so you need to be confident - flip the waffle over and continue to cook for another 8 to 10 minutes, or until golden and cooked through. Give the waffle an extra couple of minutes on each side to crisp up, then serve.

4. I've served mine on a board, drizzled with maple syrup and some delicious, molten hot chocolate, but you can serve your waffle with whatever you like from bacon, egg and maple syrup to berries and yoghurt, spinach and a poached egg, or just simply sprinkled with a little ground cinnamon.

Epic hot chocolate

Jamie: "This hot chocolate is off the scale. It's so simple to make and is much better than that shop-bought stuff you get, which is often full of rubbish and probably hasn't got much chocolate in it anyway. I don't want you to feel cheated, I want you to have the real thing... life's too short not to."
Serves 8 to 10
  • 2 pints semi-skimmed milk

For the epic hot chocolate mix
  • 2 tablespoons Horlicks
  • 2 tablespoons cornflour
  • 3 tablespoons icing sugar
  • 4 tablespoons quality organic cocoa
  • 100g quality dark chocolate (70% cocoa solids), finely grated
  • a pinch of ground cinnamon
  • a pinch of sea salt
1. Pour the milk into a large pan, and bring almost to the boil over a medium heat.

2. Meanwhile, add all the chocolate mix ingredients to a large jar and give it a good shake to combine. You need around 10 heaped tablespoons of the chocolate mix for this amount of milk. Simply spoon the chocolate mix into the hot milk, give it a good whisk and leave to bubble away for a few minutes before serving. You're looking for that gorgeous, thick, almost claggy, knockout texture.
                    ***************************************************
After 10 chocolates recipe
Serves 16-20

Ingredients

  • 8 tablespoons demarara sugar
  • 1 tablespoon almond extract
  • 1 tablespoon orange or lemon extract
  • 1 tablespoon peppermint extract
  • 1 tablespoon natural rose oil or rose water
  • 1-2 teaspoons Maldon sea salt
  • 1-2 teaspoons coffee beans, bashed up finely
  • 600g quality dark chocolate (70% cocoa solids), broken into pieces
  • optional: 1-2 tablespoons cocoa powder, for dusting

Method

1. Find yourself 4 small bowls and add 2 tablespoons of sugar to each. Add the almond, orange or lemon, and peppermint extract to separate bowls and add the rose oil or water to the last. Give each one a good stir to evenly distribute the flavours.

2. Lay out a large piece of greaseproof paper (roughly 1 metre in length), on a flat, even surface. Sprinkle over the various sugars so you end up with stripes of flavour, widthways across the paper. Add a stripe of sea salt and bashed-up coffee beans too, then leave for 20 to 30 minutes, or until the sugars dry out completely.

3. Meanwhile, add the chocolate to a heatproof bowl over a pan of simmering water, making sure the bowl doesn’t touch the water. Once the chocolate is smooth and melted, remove the bowl from the heat. Drizzle it all over the flavourings, making a covering of beautiful lacy patterns. Smooth some of the areas over with the back of a spoon so you get a mixture of textures, then leave overnight in a cool room to set.

4. The following morning, snap it up into shards and dust with cocoa powder, if you like. You can keep all the flavours separate, or mix things up for a bit of a chocolate Russian roulette. Pile them up on a plate or in a bowl, or make some cute little paper sleeves (like in the picture).

Tip: A sprinkling of chilli flakes, a few pinches of cinnamon, the seeds from a vanilla pod or some very finely chopped crystallised ginger also add great bursts of flavour.
                              *********************************************************
Marathan semifarro recipe
Jamie: "I've gone back to one of my first loves - the Marathon bar (aka Snickers) for this ridiculously heavenly ice cream. I don't care what it says on the wrapper, in my mind this chocolate bar will always start with an 'M'. Clearly I have issues left over from childhood. And look, I know you've seen me do programmes and heard me say 70% chocolate is the best, and it’s true. But I think every now and then, if something brings back memories or makes you smile, a little bit of the cheap stuff isn't necessarily a bad thing."

Serves 12

Ingredients

  • 1 vanilla pod
  • 55g golden caster sugar
  • 4 large free-range eggs, separated
  • 500ml double cream
  • sea salt
  • 3 bars of Snickers, finely chopped
  • 50g dark chocolate (70% cocoa solids), broken into pieces

Method

  1. Pop a large earthenware dish in the freezer to get nice and cold.
  2. Halve the vanilla pod lengthways and scrape out the seeds. In a large bowl, whisk the sugar with the vanilla seeds and egg yolks until pale. In another bowl, whisk the cream until it forms soft peaks, making sure you don't over-whip it. In a third bowl, whisk the egg whites with a pinch of salt until they form very firm peaks. At this point, put most of the Snickers and all of the dark chocolate into a heatproof bowl and set it over a pan of simmering water on a really low heat, making sure the water doesn’t touch the base of the bowl. Leave it to soften slightly.
  3. Meanwhile, gently fold the cream into the egg yolk mixture, then fold in the egg whites with a large metal spoon. Scoop half the mixture into the chilled earthenware dish. Fold the softened chocolate pieces through the other half, making sure you don't knock any of the air out of it. Swirl the two mixtures together in the dish, sprinkle with the reserved Snickers pieces then cover with cling film and freeze. Take it out of the freezer half an hour before you want to eat it, and serve in ice cream cones to save on washing up.

Thursday 15 December 2011

The digital story of the nativity

This is funny, watch it and see!

Christmas Paper hanging

Thank you for reading this, this is my first 'how to'. I made this for the mirror in our lounge but you can hang them anyway in your home. Round your chirstmas tree or hanging down from a window. They are so easy to make. So here you go.....


Choose the paper and light card that you want to use. I used some wrapping paper, wall paper, plain coloured paper.


Cut out circles. I used two different sizes.


 I attached the circles onto florist ribbon to make it easier to hang up. Sew down the ribbon.


 Then add the circles onto the ribbon. Don't leave any gaps inbetween the circles.


And thats it! Hang it up and enjoy!

Tuesday 13 December 2011

Hanmade Photobook

I have been working hard on a Christmas present. A year with the Thwaites Family 2011 phot book. With a double page for each month.
I havent done one of these before so I wanted to give it a try. Here are some pics.


Monday 5 December 2011

Gift bows

I think I should add this how to, to my earlier post of 'Christmas wrapped up'


Check it out here to find step by steps to create this hand made paper gift bow.

Printable gift tags

Loving these printable gift tags or notes

Go here to download tags

Enjoy your wrapping!

Saturday 3 December 2011

Hanmade Quilts

One of my 'pregancy projects' a while ago was to make a double quilt. I hadn't done one before but loved the idea of using up some fabric I had stored away. I didnt 'quilt' the patches but made some of my own patches, which I appliqued. I put a frame around and put wadding inside.
Since then I have made a few similar ones, but much smaller.

Here is the double quilt


I made this one recently


Think it is quite cute for babies to play on.

Thursday 1 December 2011

Next fabric project

I have been busy making recently and have alist of things I want to make particuarly for Christmas presents.

So here is the fabric of one of my next projects...


Can you guess what I will make??

Hand scrub recipe

Try this tangy hand scrub recipe by Kate Moores at Oakwood Aromatics, as seen on Kirstie's Handmade Britain. Perfect as a luxurious gift (whether that's for a loved one or yourself...).
Ingredients
3 tablespoons olive oil
3 tablespoons sugar
5 drops of your favourite essential oil
1 pinch of dried herbs such as lavender, thyme, rosemary or marjoram
1 fresh lemon or lime
Method
  • Mix the oil, sugar and herbs in a bowl.
  • Carefully add the essential oil.
  • For extra scent and style, add a little of the lemon or lime zest. Stir well.
  • Pour into a pot for later use.
Use
To use, place a teaspoon of the mixture into the palm of your hand. Rub and massage this around your hands, around each finger and into the cuticles.

Rinse your hands in warm water while rubbing them all over with slices or quarters of the lemon or lime. This cuts through the oil and helps dissolve the sugar.

Once you've rinsed your hands thoroughly, pat them dry.

Wednesday 30 November 2011

Christmas wrapped up!

We are apart of a local church and in a few weeks time we are hosting a free christmas wrapping service. I have been looking into ways of decorating wrapped presents to make them look pretty be easy to make and so that kids get get involved.

I have used any kind of paper: wall paper, maps, card and christmas paper. But it doesnt have to be particuarly christmasy, with the layers of paper, glitter and ribbon it adds to make the christmasy look.

Here is what I have come up with  . . .


                                                                         Snowflake


                                                             Glitter roses and holly leaves


Glitter tree tag


Flowers


Paper tags


Ruffle flower


                                                                            Have a go!

Monday 28 November 2011

Autumn Walk

Today my family and I got out for some fresh air and exploring, here are a few of the pictures I took.