Here it is! So pleased with how this turned out. I have taken some pictures for you to follow to make your very own. All I would say, that sometimes making a quilt can be scary, but go for it! take it step by step, keep it simple and enjoy your creation!
My friend asked me to make this for her as a gift for one of her friends. She wanted me to use the t shirt logo in the quilt.
So here you are. . .
Gather your ironed fabrics together.
I started with a T-shirt, cut out the logo to size.
Cut your squares with a rotary cutter
Start plotting them together in a layout you are happy with.
Once you know where each square will go, start sewing. If its easier start sewing in pairs, with pattern sides together sew along one edge. Iron out the sewn edge and repeat.
Continue sewing the sqaures together until you get rows and then sew the rows together. Keep pressing the seams open.
Once you have completed the front, layer it on top of the wadding which is ontop of the backing fabric.
Then pin in place. You can buy special quilters pin but I used safety pins. This is a really important part of the process as you dont want the quilt backing to slide around. Start pinning in the centre working your way out, making sure the edges are secure too.
Before you start sewing your straightlines make sure you only sew edge to edge of the front of the quilt fabric. DO NOT sew over the edge onto the wadding. This is really important.
Right now, start sewing, so slowly and keep it steady, not too fast.
Once you have done all the lines, cut the wadding off from around the fabric, making sure you dont cut the backing fabric.
Make sure there is 1" worth of backing around the edge of the quilt.
The above picture shows where to cut, looking good so far!
Because you didnt cut the backing fabric, this will be the edging around - clever!
Start by folding the fabric to meet the edge of the quilt and the fold over again and pin.
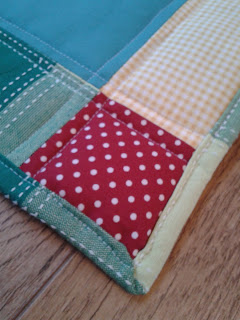
Now for the corners... with a ruler mark 1" for the quilt corner to 1" in on the top side. Fold along that line. And then tuck over following the folds you have down previously. They should match up together. Pin in place. Follow round the whole edge.
Doesnt it look good?
Here are my corners. If you get stuck this is a great tutorial for doing this, go here.
And tada!
Well done, especially if it is your first quilt!
I have enjoyed looking at this blog about making a simple quilt, go here.


No comments:
Post a Comment