Hanmade in Cornwall

Hanmade in Cornwall

Thursday, 17 September 2015

more Hanmade bunting

A friend of mine was in need of some bunting and quick. 
So I went and got some bias binding, 15 metres to be exact! 
I already had a triangle template. 
Using a rotary blade (so much quicker and straight forward than scissors) 
And got cutting. I cut alot about 56 triangles. My 5 year old helped me out by stacking and counting for me!


I spaced each triangle with a triangle space Between each one. 
Using bias is the best for this as its already folded. 
I did the quick way using single piece of fabric. As I used the rotary blade the edges were near and didnt fray. 
So there you go, why dont you make some bunting, just because you can! 

Wednesday, 16 September 2015

Hanmade patch cushion

Just incase you didnt know I love making cushions!
This time I was making one for a friend.
Grab your fabrics. I choose purples

Approxamatly cut out the shape and sizes you want.
I went for squares and rectangles do I could get a whole flower in. 
lay them out how you want them. 
This is the front.

One piece for the back. 
(Note not ironed yet! Opps!) 

Sew together, pressing the seams open.

this is the back of the front. 

Then cut the corners off. 
The helps to give a neat corner. 
turn right way round.
Use something shape into the corners so they look nice and pointy. 

If you havent pressed it yet do it now**
Stuff with wadding. 

When its full Pin open edge together. 
Sew together. 
For this I did a slip stich by hand. It keeps it nice and neat on the inside. 
And thats it! 

What a lovely gift it will make.


Saturday, 15 August 2015

Hanmade skirt

So what do you do if your low on elastic (not enough for daughter waist) and have perfect fabric for skirt? I looked into making a skirt with just elastic at the back and a nice waistband. I normally do elastic all the way round so this was abif different.


It worked out well and she loved it!

pimp up my caravan

We got our caravan a few years ago, we put in a new carpet and did a few upkeeping jobs but last summer we thought about putting our stamp on it. We got excited about what we could do especially watching George Clarks Amazing Spaces.
 We got inspired! How do we want to change it? After looking into paint we discovered Annie Sloan. This was the answer to painting the wood cupboards. No preperation needed, just what I wanted. I was happy to paint but didnt want all the sanding that comes with it. Annie Sloan paint is AMAzing! You can paint it directly onto any surface with no preperation. Use wax to finish it off and thats it and the jobs done. Simple. It leaves it in a chalky matt finish which I really like. We got an off white and duck egg colour to paint our interior.

We also got the curtains remade with blackout lining. An improvement on the crushed velvet peach curtains! The seat cushions were recovered, phew so much better.

So are you ready for some pimped up pictures?
Lets do this!


Go to here To find out how to make your own Sharpie cushion
I also painted the front of the fridge in blackboard paunt - well that
 went down well!

Hanmade canvas art

Ive been thinking for a while how to add to my daughters bedroom walls. 
Wanted some pictures or art work that she would like and something that she wouldnt grow out of quickly. 
Then I remembered I had a few blank canvases. 
I didnt want to kust paint a picture. 
So we did some experimenting. 
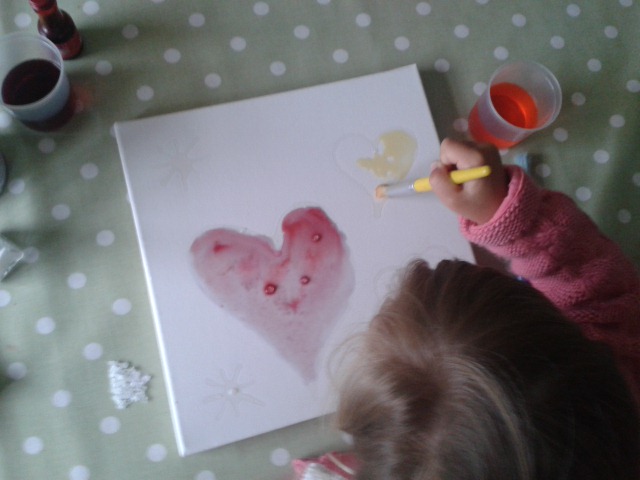
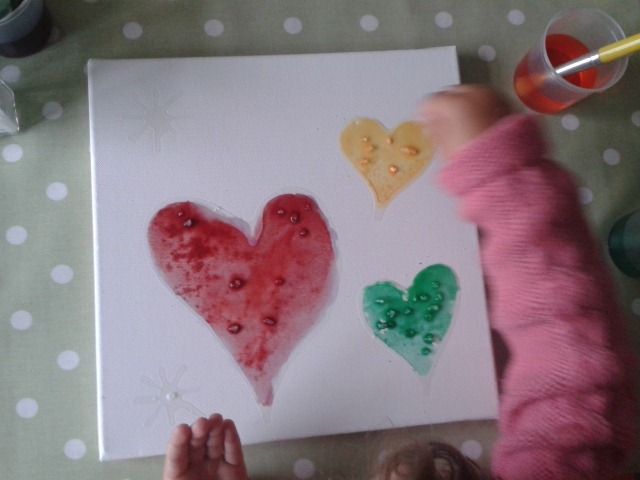
On the first smaller canvas we used PVA glue to draw our heart outlines. 
We let that dry over night.
The next day I got out the food colouring, watered it down and we got painting. 
I got my daughter involved which she loved. 


 on the wet bits we put rock salt to see how it would work
Finished the blue background and let it dry.

When its dry take all the salt off. We also tried table salt but that didnt work so well.
 My daughter loved making this together. A great mini project but also she can look at it 
On her bedroom wall. 
All round thumbs up!

But then I decided to make one for her wall, why not?!

I love how this turned out. I used watercolour paints for this canvas. It takes quite abit of woeking the paint in because its meant for oil paints. But I like the washed effect. I think the colours worked well too. 

Using rock salt worked really well, I love the effect. 


Are you inspired by our glue, paint & salt art? 
Give it a try :-) 


Tuesday, 4 August 2015

Hanmade beach cushion

Every spare bedroom needs lovely cushions on the bed. And our room needed it. I wanted to keep it simple. I also wanted to make one smaller detailed cushion.
So check out what Ive made!
Two square envelope pinstripe cushions

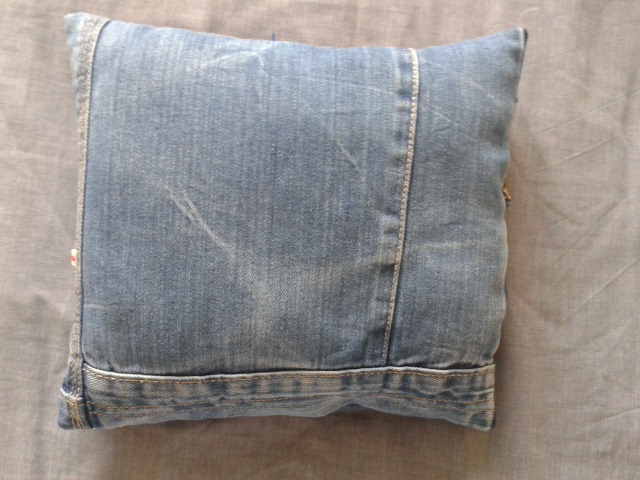
with a small beach denim cushion

Bunting, text and waves, plus reusing some old jeans


I like my little beach cushion. 

shrink plastic goodness

Oh yea! I discovered this through a friend who owns a gallery and makes small magnets and badges mafe from shrink plastic. Well my mind started going and thought what I could make.
So I was given a pack for my birthday and got experimenting.
So you will need permenant pens, watercolour pencils, a hole punch, scissors, plus magnets, keyrings, earrings etc that you might want to add at the end.

I used white plastic. It also comes in different colours and clear. 

Cut the pladtic. **Remember it shrinks, upto 7 times smaller. Do cut your shape and size with this in mind. 
Then use the permenant pen to draw onto the scratchy side. 
Above was my first experiment.

I then wanted to make some earrings. So I cut the shape out, it looked huge for earrings! 
Drew the patterns in. I hole punched to top of each for the earrings to go in. Then put them on foil on a baking sheet. Put that in a preheated oven. Watch it. It will take about a minute. It will curl and bend in the oven. When it stops curlung and shrinking take out immediatly and put something heavy on top. 
Thats it done! 

Dont they look good? I love the effect they make when its shrunk down. 
Hmmm what else can I make? Button earrings? 

My daughter was interested in this too. She spent a long time adding all the detail in. We then added a pin on the back to make her own badge - she loves it! 
I also tried adding some colour sfter adding the black pen. Which worked really well. The pink chalky pencil didnt work well as it smudged. 

There you go - give it a try!